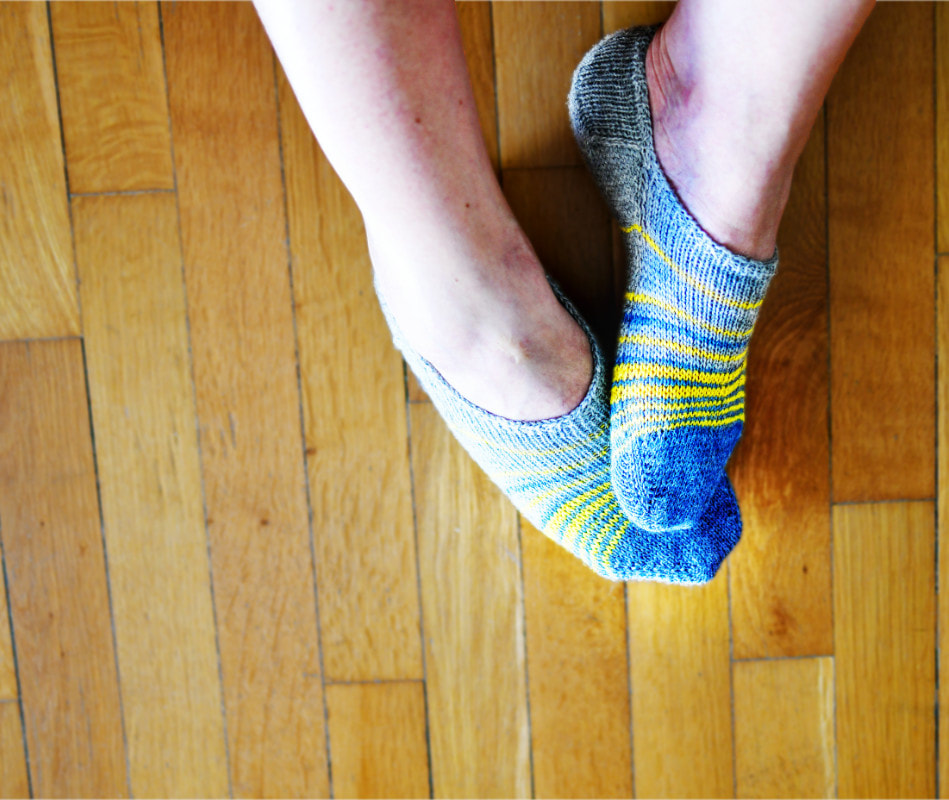
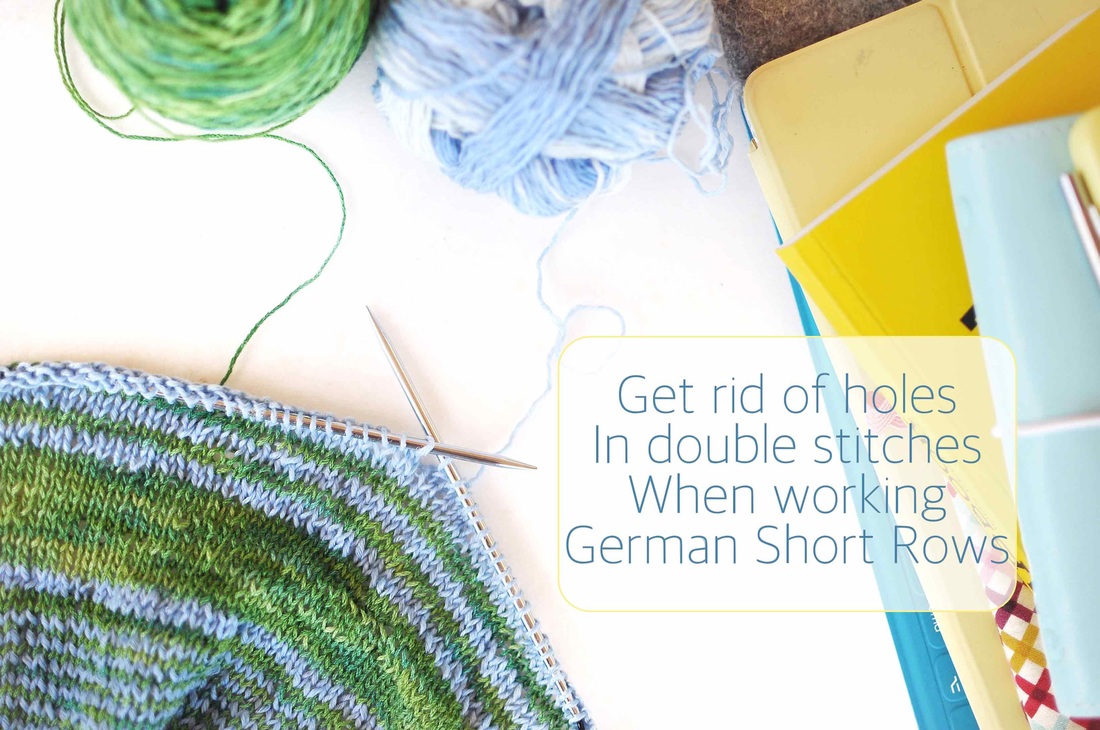
Probably the number one question that knitters ask me, is how to tighten up the last double-stitch when working German-Short-Rows in the round. This final turning point from the last short row - the last double-stitch to be worked when starting knitting in the round again - is slightly turned to the other side and ends up big and funny looking when it's knit as usual.
|
I don't have any mysterious, innovative and smart method to show you this time, but I can tell you what I usually do:
There are two ways I use to "eliminate" those ugly stitches - one employed during knitting and one other I often use to improve the look of all big stitches, not only short-row related ones, after the project is ready. Sometimes I do both, if needed - sometimes one is enough. |
|
|
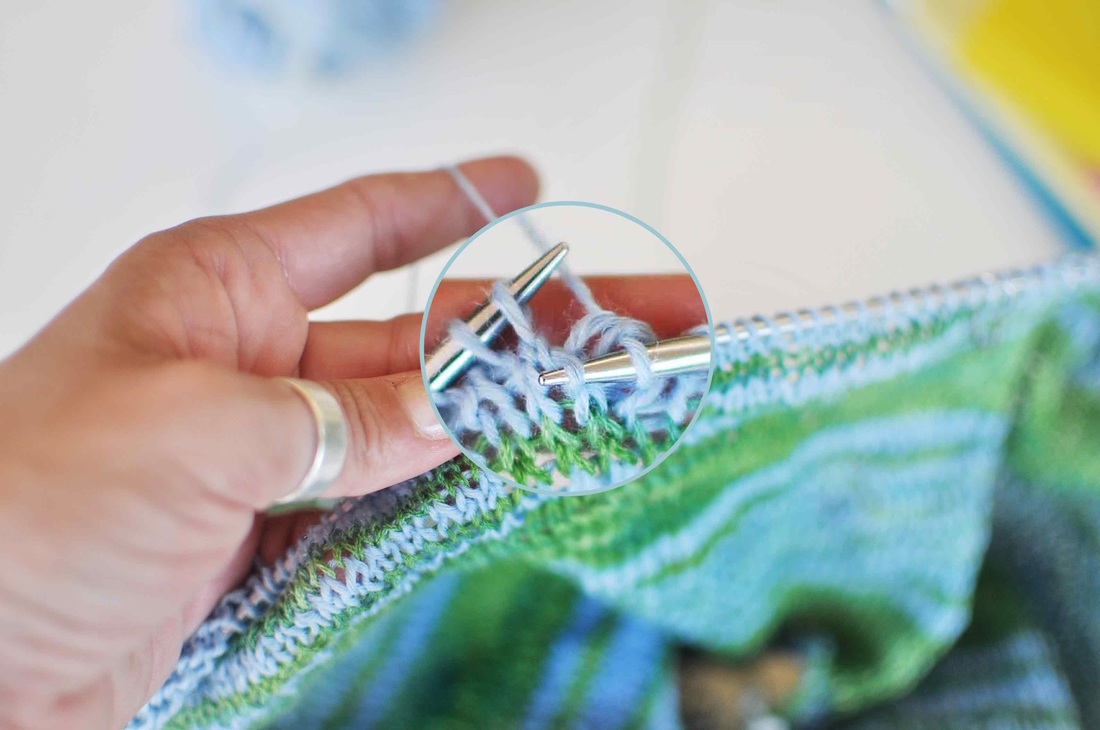
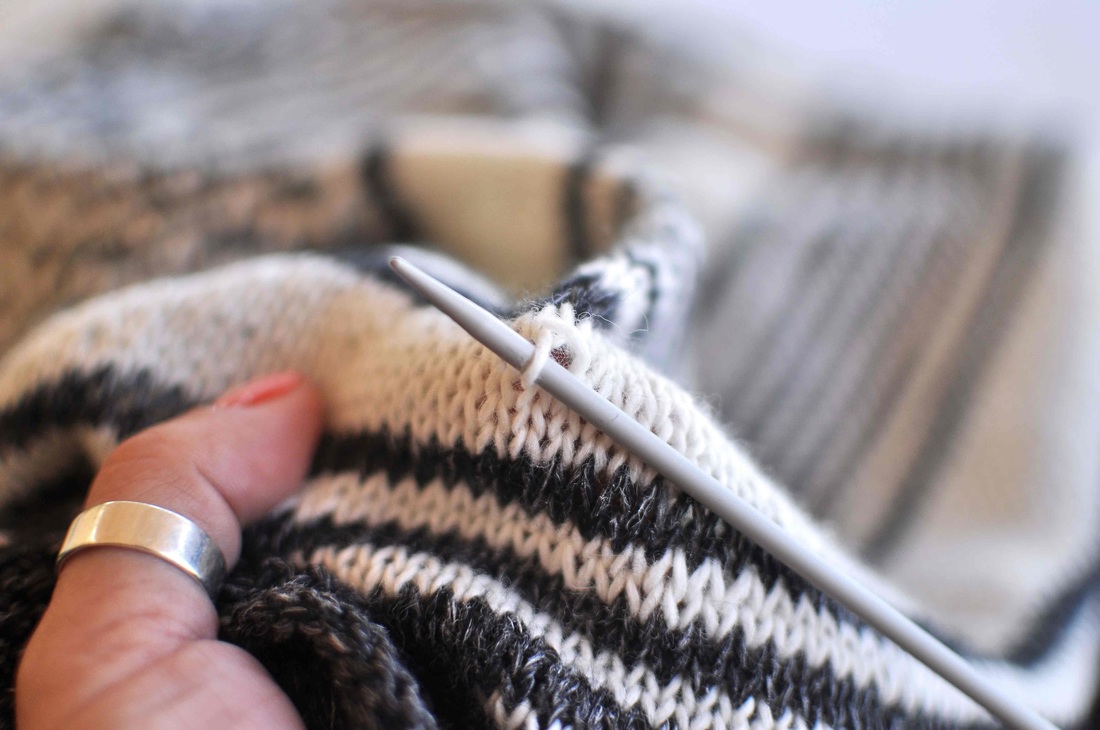
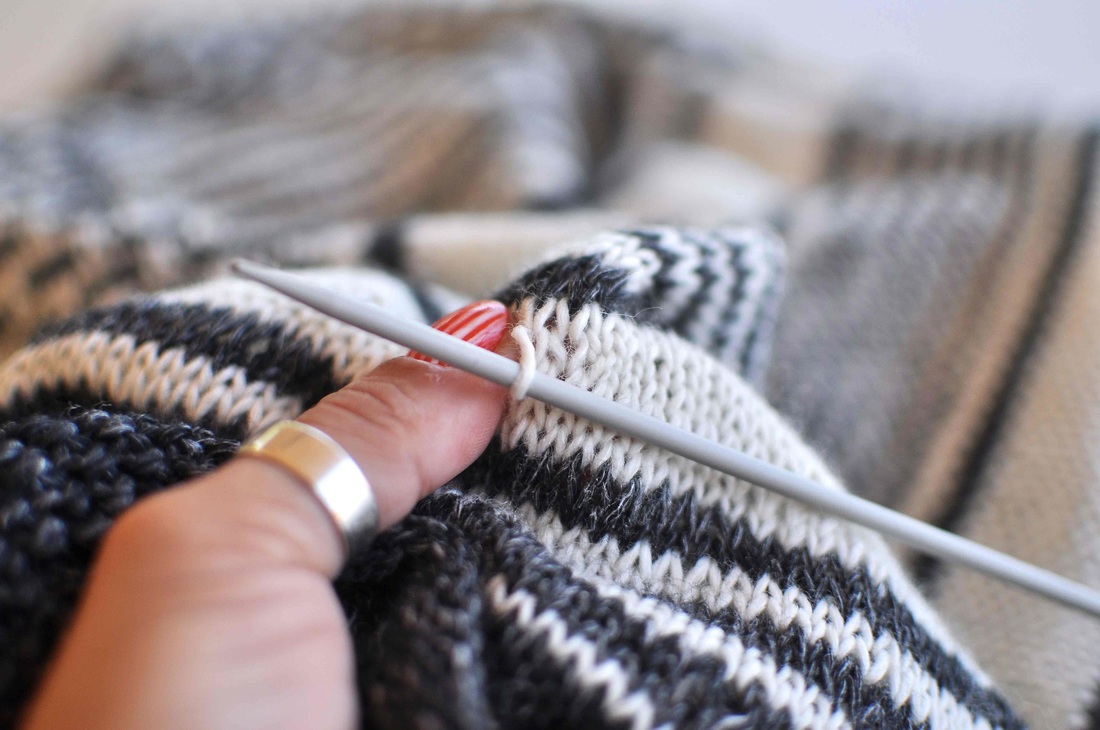
1. To immediately diminish the size of the last double stitch during knitting, work this double-stitch as usually in the next round and then stop before knitting the next stitch. Take a closer look to the area. On the left needle there are many small stitches all cramped up together, since two short rows are coming out of the big double-stitch. On the right we can see that normal sized stitches continue on the same row like our fat stitch - so in this case it is probably the best idea to work towards the left to even out this stitch and give the extra slack where it is needed more.
|
Insert the right needle (or an extra DPN needle if it's easier to handle) into the right leg of the stitch, that is positioned 2 rows below the first stitch on the left needle (as shown above)...
|
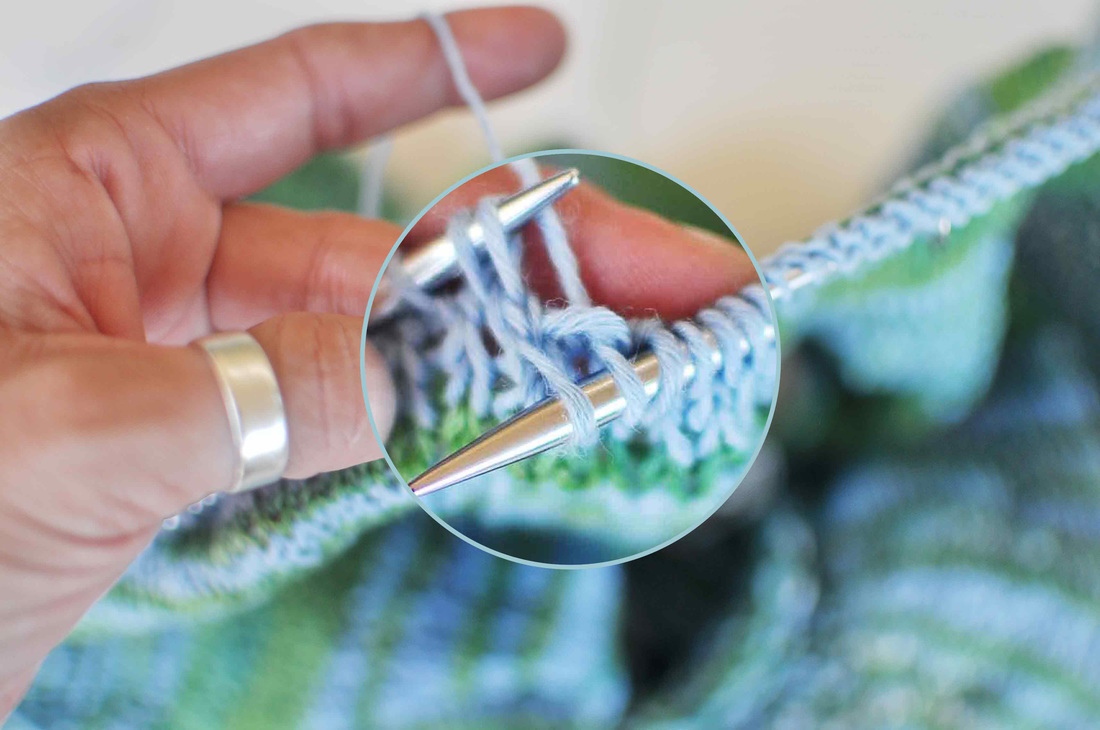
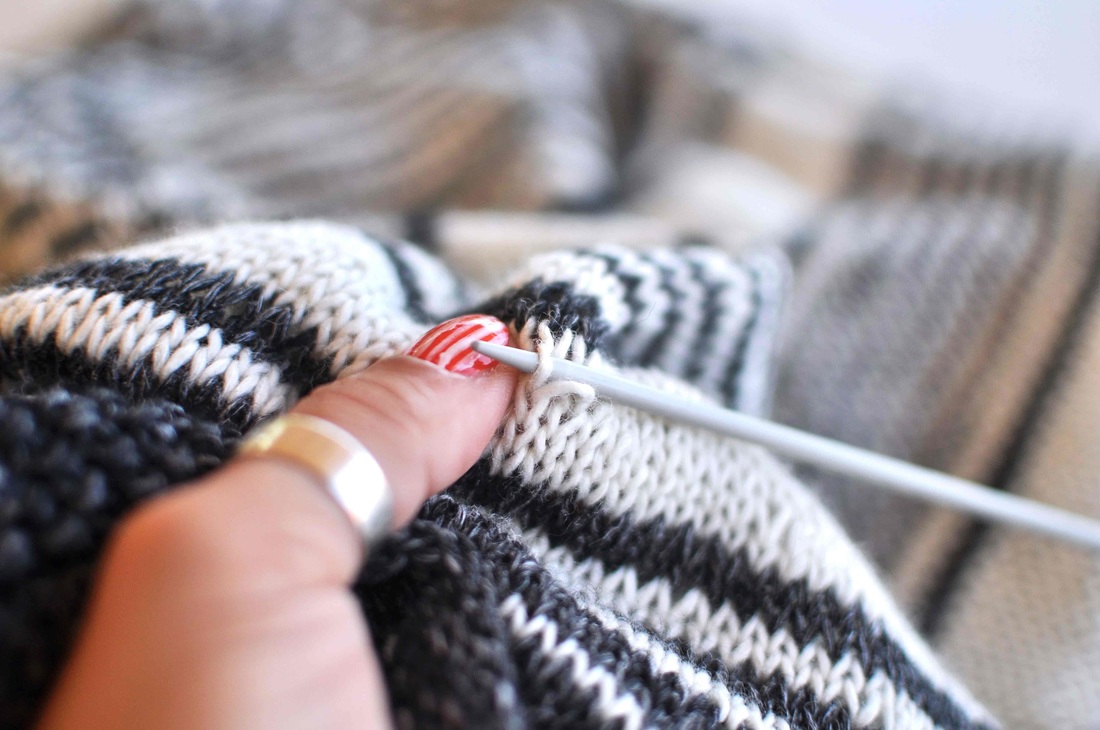
Now pull this right leg out towards you.
It is often helpful to hold the left leg of the stitch in place with your thumb, so that the extra yarn will come from the big double-stitch and not the left side of the small stitch. Pull firmly but don't go too wild - just enough to have pulled out a nice length and to have reduced the huge double-stitch in size, because that's what we want to do in this case: Manually transporting yarn from one stitch to the other. |

|
|
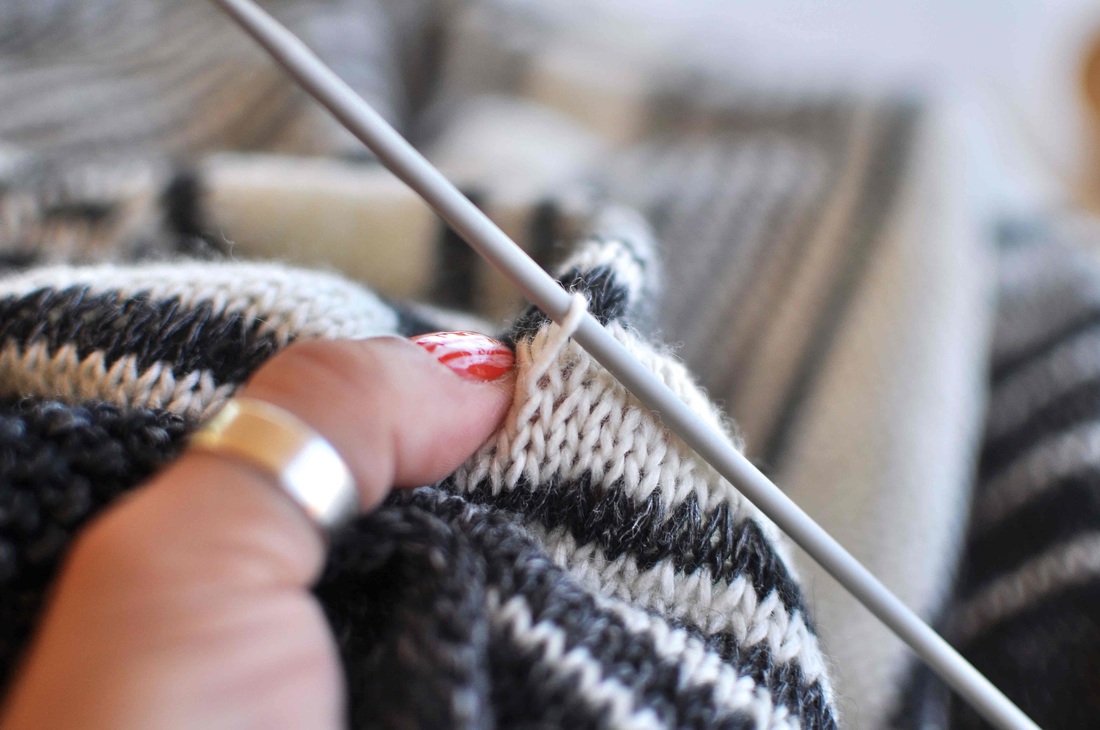
This surplus length of yarn needs to be distributed evenly now: Insert the needle in the left leg of the same stitch and bring the extra length of yarn to this side of the stitch.
Again without using too much force, carefully and slowly. Continue in this fashion to the next stitch on the left and pull first on it's right leg, until the excess length of the yarn has been pulled out and the stitch to the right looks even tensioned again, then on the left leg again. |
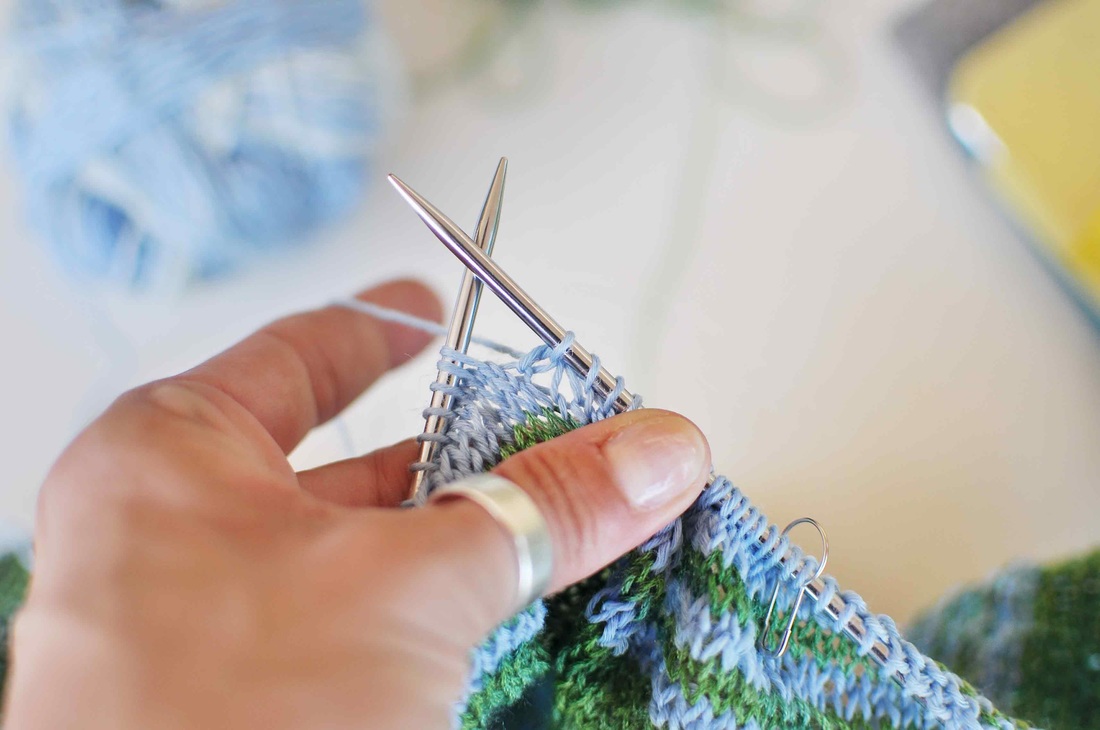
Work like this towards the left, stitch for stitch and carefully move the extra yarn from one stitch to the other and let the yarn travel to the side in this way. The idea here is to try to pull out a tiny bit less excess while working each stitch, so that your pulled-out loop gets smaller each time because every stitch "absorbs" a small fraction of the excess until it is all gone. You don't want to end up with all the length on the left side of your double-stitch and just transport the huge stitch itself from one side to the other.
What you need is to have this extra loop of yarn distributed all over the 3-5 stitches towards the left, or until it isn't visible anymore (it doesn't need to look perfect at this stage).
What you need is to have this extra loop of yarn distributed all over the 3-5 stitches towards the left, or until it isn't visible anymore (it doesn't need to look perfect at this stage).
|
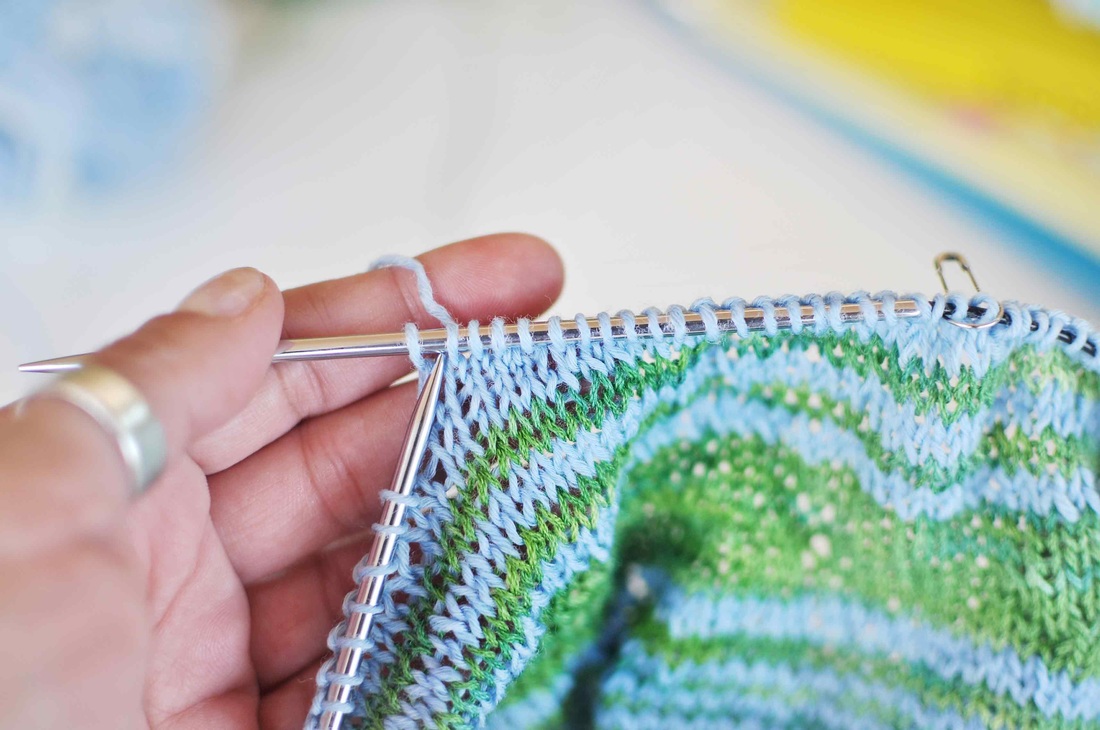
Finally the big double-stitch has just lost some of it's size and the tiny stitches next to it have grown, making them all nearly even:
|
|
|
On the picture on the right, where I have continued knitting about 4 stitches more, you can see clearly that the big double-stitch has been transformed into a normal sized stitch, while the extra length of yarn has been "incorporated" into the smaller stitches to the left, making those stitches larger in size and the difference between all of them less pronounced.
There are other methods where you are working this last short row stitch differently as the others before, to "make it behave" (sometimes by knitting each leg of the ds together with other stitches, for example).
I am personally not a big fan of this idea - even if it might be quicker to work. It can distort the stitch more if not done right, make the fabric pull in at that point instead of letting the natural flow of the stitches open up during blocking, leave the smaller stitches in their tiny misery or add bulk to a section where we want to keep things nice and flat.
I am personally not a big fan of this idea - even if it might be quicker to work. It can distort the stitch more if not done right, make the fabric pull in at that point instead of letting the natural flow of the stitches open up during blocking, leave the smaller stitches in their tiny misery or add bulk to a section where we want to keep things nice and flat.
|
Next step: Blocking
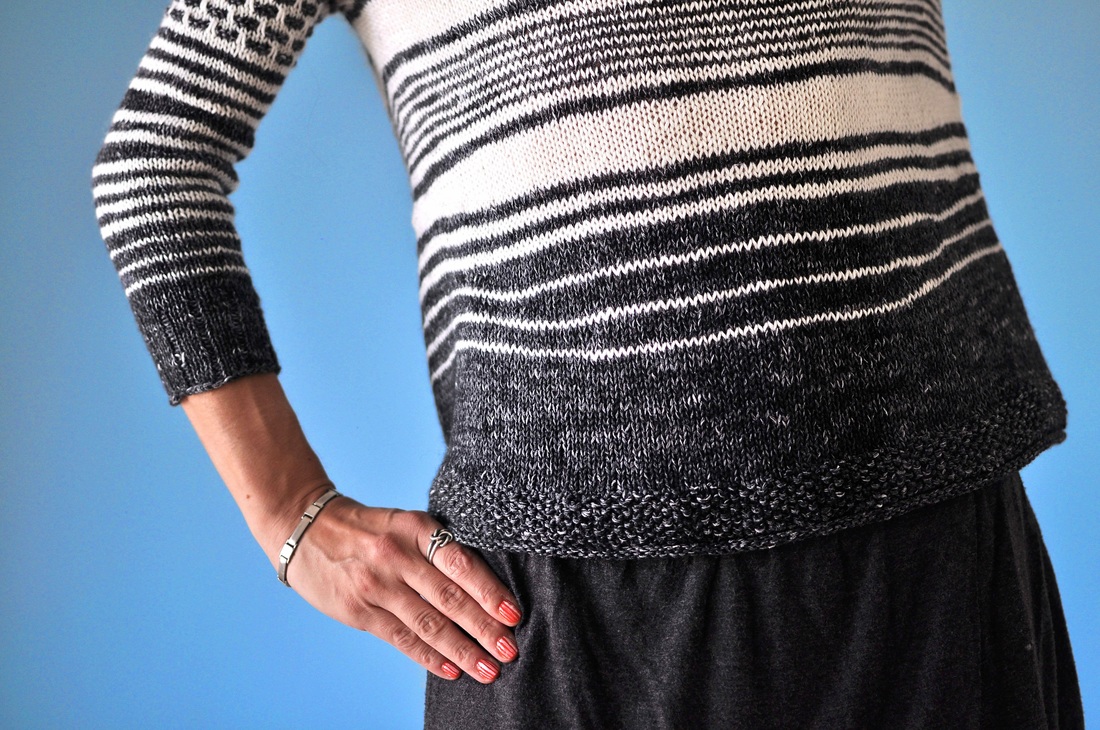
This probably is a logical suggestion, but sometimes we forget how the process of soaking, washing and letting air-dry a garment (or steaming, for the more experienced knitters) can not only change the whole look of our garment, but also helps wonders with letting the yarn bloom and even out those problematic stitches. So, in the case that the result wasn't perfect after working the above tip, blocking will make a big difference - since we never disrupted the natural flow of the stitches. |
|
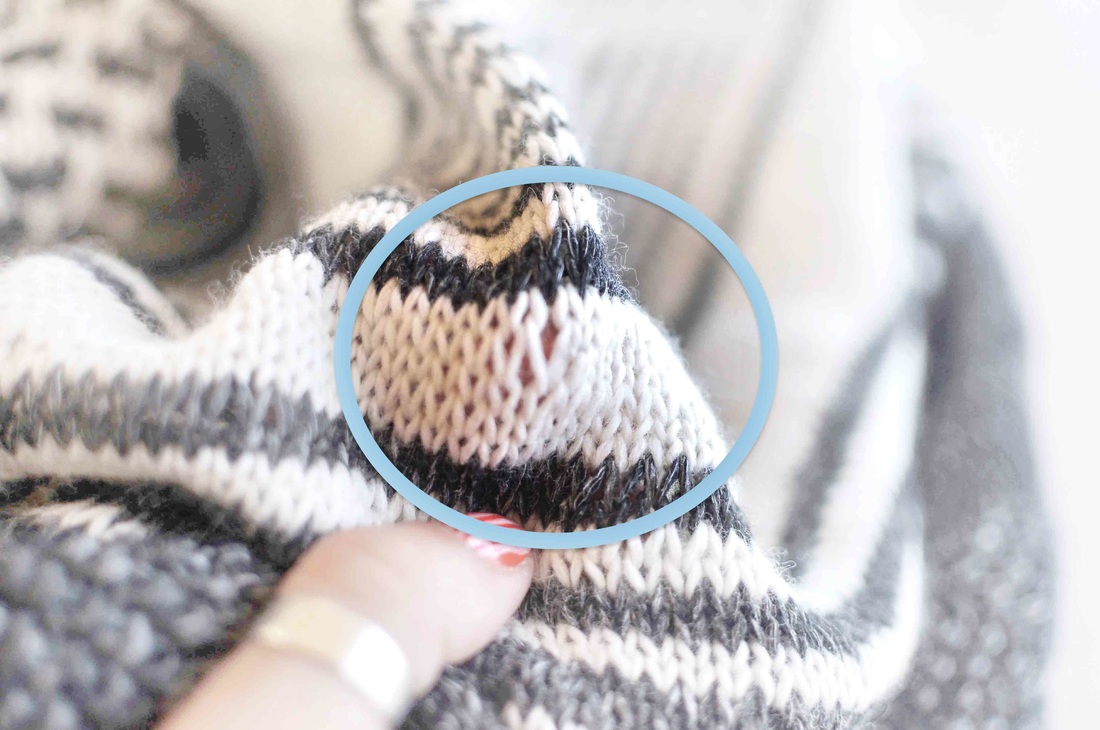
2. Eliminating larger stitches, even after having completed the project:
Good news is that you can manually repair the tension to get rid of all big, distorted stitches in your knitting - not only the short row double stitches discussed here - but also when you have strange laddering going on in magic loop knitting, strange holes near the underarm cast-on in top down knitting or the occasional giant stitch making an appearance.
If you already have finished and blocked your project and you still want to get rid of any stitch that looks too big, or if you still find that the above tip didn't yield a perfect result, even after blocking, this "Post-Production" process will surely be of interest:
You will need a smaller sized needle, good lighting and some patience to make this work:
|
Take a look at your knitting to find out if it's better to move the extra yarn to the left or to the right of your holey stitch (or towards both directions, if possible).
Then just follow the same logic as described before: Insert the needle in the right leg of the stitch, carefully pull the excess length out and continue to the left leg of the same stitch, thus transporting and distributing the excess yarn to the next stitches of the same row until the extra loop disappears. |
|
|
I find that we knitters sometimes forget that we are just working with sticks and a long length of string, which makes up a fabric of interlocked loops. A fabric that one can influence at any given time by shifting the amount of length in the finished surface - during but also after knitting.
This fact actually opened up a whole new way of thinking to me; on how to handle my knitted fabric and to understand a lot of things about the flow of the stitches in knitting.
As I said the logic behind all of this is really simple - too simple maybe and not at all dramatic - but it does the trick every time: With just a little patience and an even tension, all "non-conform" stitches, ugly double-stitches or other unwanted distortions in our knitting can be successfully remedied and persuaded into shape.
|
This post-production method might probably be an annoying idea to some (as most finishing work in knitting) - but it is one way that will lead to a sure and risk-free success and in case you didn't get it right the first time you can always go back and change things up at a later stage. The important thing for me is that the final fabric of my project can look flawless - even if I didn't notice the problematic area in the first place.
|
I am sure that this isn't the only way to eliminate this kind of problematic stitches - it is the way I prefer for years now and I am very happy with it because it allows me the freedom to repair any unevenness that might have escaped me during knitting.
But maybe you have another method that works better for you?
But maybe you have another method that works better for you?


 RSS Feed